

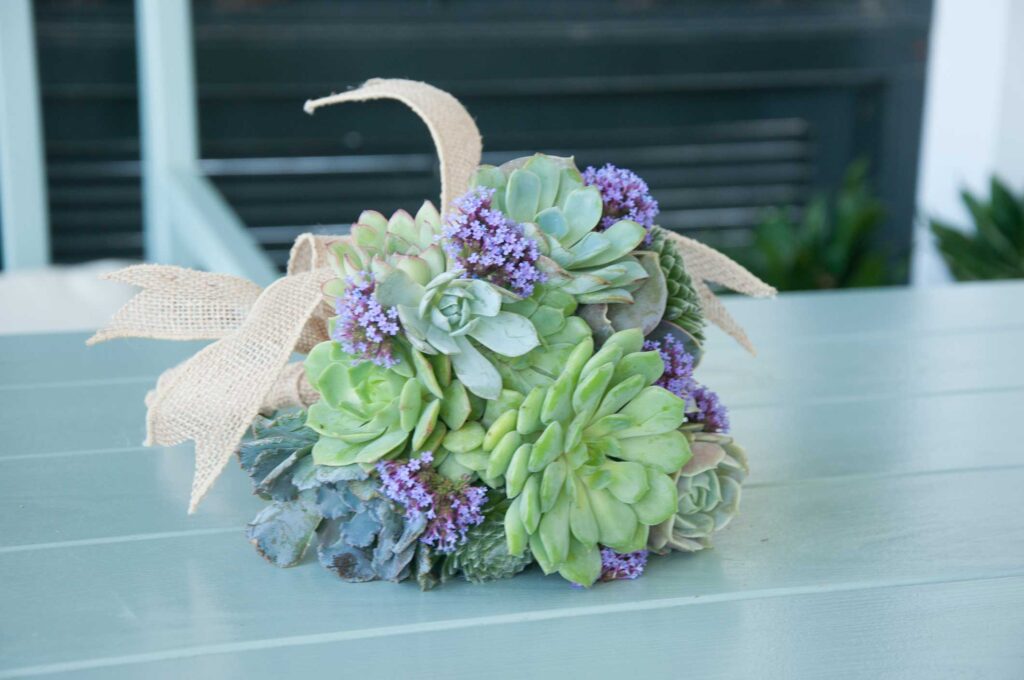
If you’ll get married in 2024, you might be thinking about the different ways you can make your special day stand out. So, you might have opted for quirky backdrops, large & gorgeous centerpieces, as well as an outdoor ceremony, however, there is one more thing that you could do – you can choose to have a cute succulent wedding bouquet.
However, these plants are totally different from roses or other, traditional wedding flowers, which is why you might be wondering – how can I actually make the bouquet by using succulents? Luckily for all soon-to-be brides, the article below will help you. So, without further ado, let’s take a look at the 2024 guide below:
Step: 01: Gather All of The Materials You’ll Need
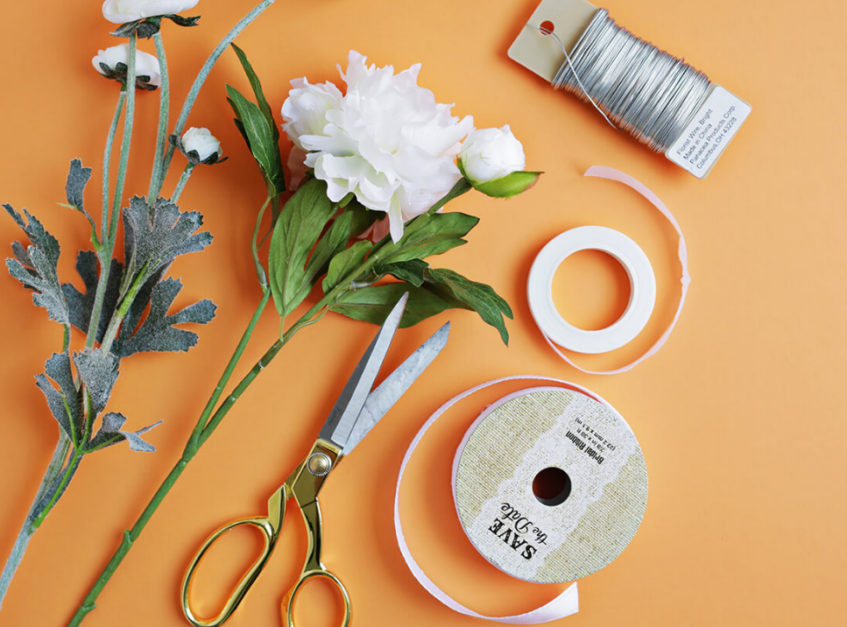
The very first thing that you should know is that the items below are only examples of what you should get, which means that you can opt for your own colors, succulents, and flowers that’ll be featured in the arrangement. For starters, you’ll need 1.5-inch and 0.25-inch spools of pink ribbon, 3 packs of floral tape, floral wire, as well as scissors and pins.
When it comes to the plants, you could use red roses, baby’s breath, two large & two smaller succulents, and pink Lillies. Again, the plants you choose to use for your bouquet will entirely depend on your preferences and needs, hence, you can choose something else that’ll suit the concept of your gown and wedding.
Step 02: Start By Trimming The Flowers
Once you’re finished gathering everything you’ll need for the arrangement, your next step is to start working on the flowers. Now, you should trim the leaves and ends off, however, you should also ensure that you leave some greenery that’ll fill in the blanks in the bouquet. Keep in mind, you can always trim them later on.
Step 03: Place The Wires Around The Stems
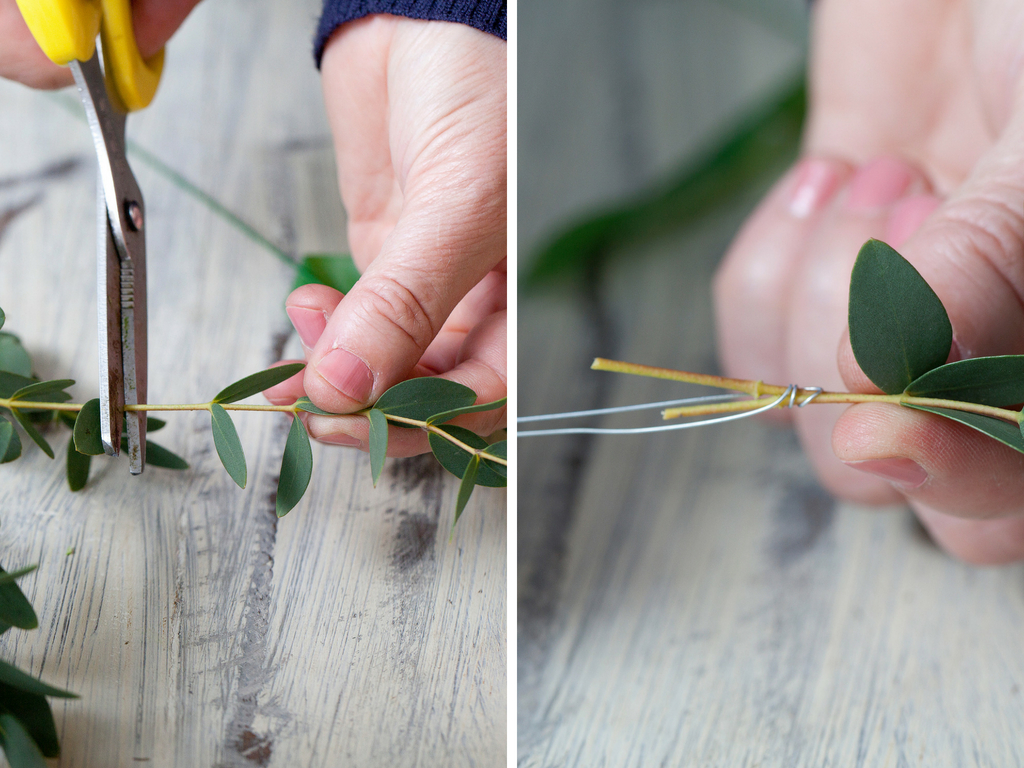
Next, you’ll have to wire the flowers you trimmed. This is something that’ll require a bit more time, however, it isn’t difficult. To wire them, you should stick the wire through the thickest part of the stem – which is right under the bulb. Pull it until both sides are even, and then begin winding the wires around the stems. This will allow you to control them easily while arranging them.
Step 04: Secure The Stems With Tape
Again, you’ll need to start from the top. While holding the tape with your finger, twist the plant while pulling the tape around it. You should know that it won’t stick well if you don’t pull it tightly together while you’re working on it. Additionally, you shouldn’t use duct tape for this step, especially since it’ll influence how your arrangement looks later on.
Step 05: Prepare The Succulents
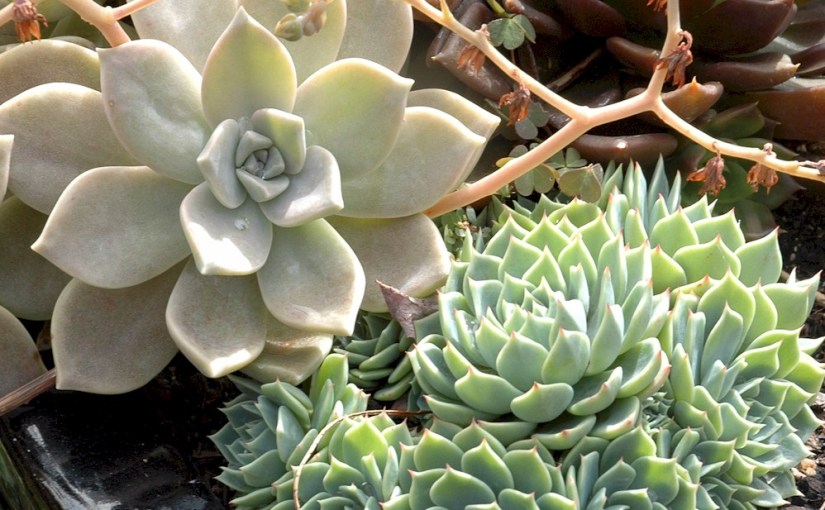
Before you can add them to your arrangement, you’ll need to take them out of their containers and wash them under some water. Once you’re done, you should repeat steps three and four, however, you should know that succulents are more tender, hence, you’ll want to be extra careful when working on them.
Because they’re tender and fragile, you might want to purchase spare ones such as the ones featured on Succulent Market. By doing so, you can ensure that you can finish your bouquet, instead of stopping and heading to the store to purchase new ones, hence, consider doing this since it can save you some time.
Step 06: Arrange The Bouquet
If you’re sure that you properly wired and secured the plants, you can begin with arranging the plants. You’ll want to start from the center since it’ll allow you to place the largest flower. When you’re done, you should begin filling the blank spaces. Once you have the base – which is basically half of the arrangement – wire it all together tightly. Again, avoid using duct tape, it won’t look good.
Step 07: Work on The Placement
This step will be entirely up to you, which means that you should work on it until you actually start loving what you made. So, if you don’t like the placement of some of the plants, you could choose to move it to one side or the other in order to figure out what suits the arrangement best.
Step 08: Don’t Forget to Secure it!
A lot of people overlook this step, but it’s one of the most important things that you could do after you’re done making the arrangement. You’ll want to wrap the stems with wire and tape, however, you should remember not to wrap it at the bottom since you’ll want to place it in water until the big day arrives!
Step 09: Decorate it
The last thing that you’ll need to complete is to wrap the bouquet with a ribbon of your choosing, and don’t forget to use the aforementioned pins to keep the entire piece in place. Depending on your preferences, you could even choose to spray some hair spray on the flowers – not the succulents – and then place some glitter on them. By doing this, you’ll be capable of making the arrangement even more unique.
Step 10: Put it in a Vase
Last on our list, but not least important is that you need to place the bouquet in a vase filled with fresh water. This will allow it to survive until your wedding day arrives. Keep in mind, you shouldn’t make it a week before the wedding, instead, one or two days before the ceremony is sufficient.
Conclusion
If you wish to make your wedding even more unique than it already is, you could choose to make a bouquet that features succulents. And, if you opt for following some or all of the tips we mentioned in our guide above, you’ll be able to make the entire process easier, less daunting, less time-consuming, and more importantly, less stressful for yourself.
So, now that you are aware of all the things you’ll need to do in order to make a wonderful floral arrangement for yourself, you might not want to lose any more of your time. Instead, go back to the beginning of this guide, and start with the very first thing we mentioned – which is purchasing all the materials, tools, and flowers you’ll need for your bouquet.